
Trips, costs and the at-home work
PickComp follows a buying trip the way it really goes: a quick look at the sale, a lot of sorting at home, and listing in batches later.
At the sale
- Start a trip and name the place. Search for the store or sale address, or type it.
- Shoot each item. Photos or a barcode. The lookup starts right away.
- Tap Bought or Pass. Passes keep their lookup.
- Bags bought whole. Snap the bag, name it, and unpack it at home. A bag can share the trip total, or carry its own price.
- Stickers. Type the sticker price if you want to split by sticker later.
Quick look. Want to check something you are not sure you will buy? Use Quick look, on Home. It looks the item up without starting a trip.
Checkout and the split
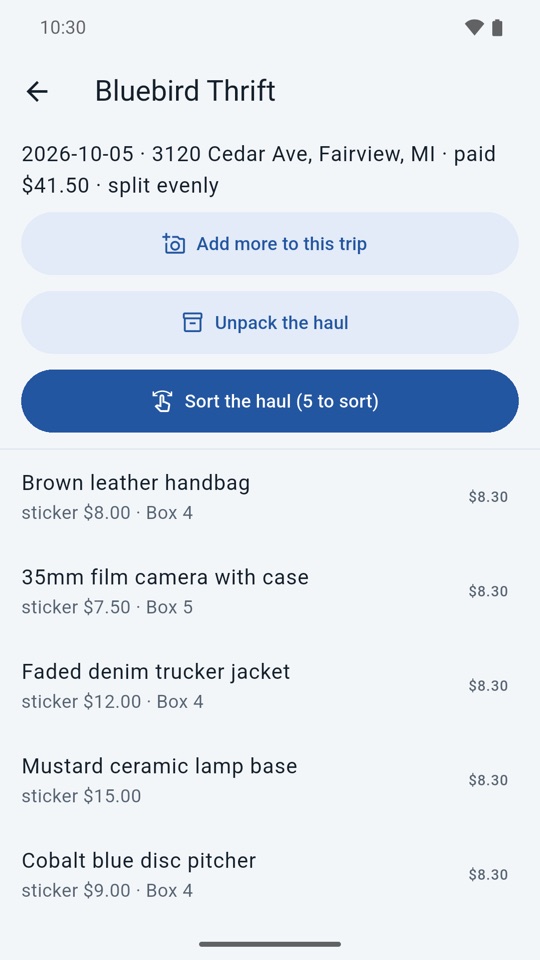
You type what you paid once, for the whole sale. PickComp works out what each item cost.
- Evenly. Every item gets the same share.
- By sticker. Each item gets a share in proportion to its sticker price. This needs a sticker on every item, and a price on every bag.
- To the cent. Shares always add up to exactly what you paid. Nothing is lost to rounding.
- Mileage. Enter the miles to this stop. PickComp can fill them in with driving miles from Google Maps and log them in Mileage with the trip. Turn on "Heading home after this?" to log the drive home too.
Every item then carries a real cost, which is what makes its profit true when it sells.
At home
- Unpack the haul. Name things as they come out of the bag. A photo is optional. Note which box they go in.
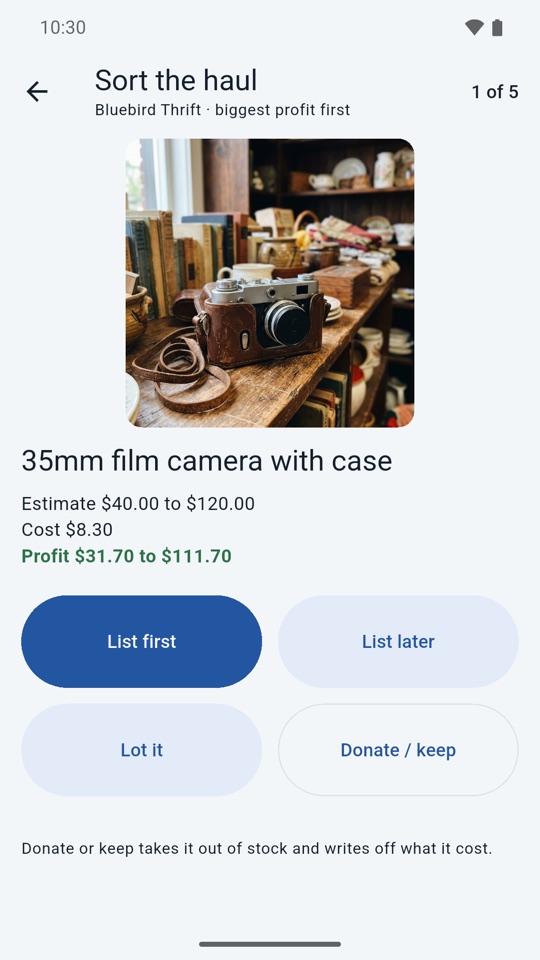
- Sort the haul. PickComp shows one item at a time, biggest likely profit first. Likely profit is the AI estimate less what the item cost. Items with no estimate come after, in the order you shot them.
- Pick a path for each item: list it now, list it later, lot it, or donate or keep it. Donate or keep takes it out of stock and writes off what it cost.
Storage spots
Know where everything is without hunting for it.
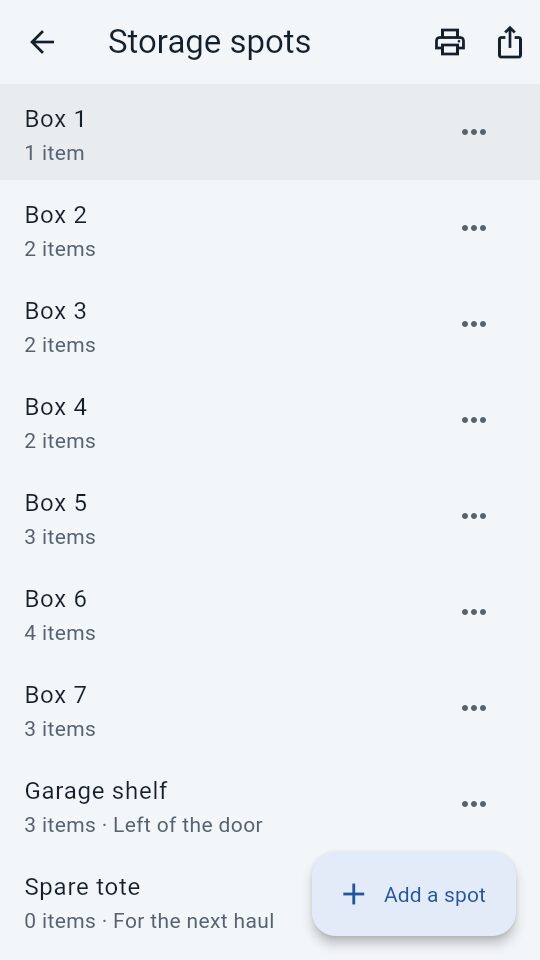
- Name your spots. Bins, shelves and bags. Give an item a spot from its screen, or pick several items in Inventory and move them together.
- See what is in each. Every spot shows its items, and you tap one to open it.
- Print labels. Print a sheet of QR labels for your spots, or share it as a PDF. Names with accents and Greek or Cyrillic letters print.
- Scan a label. In Inventory, scan a spot's label to open that spot's items.
Getting it listed
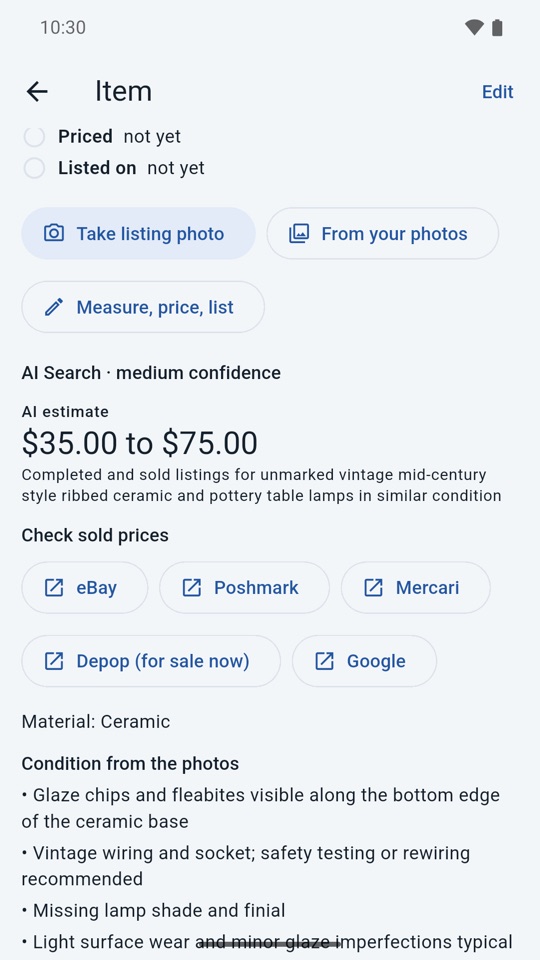
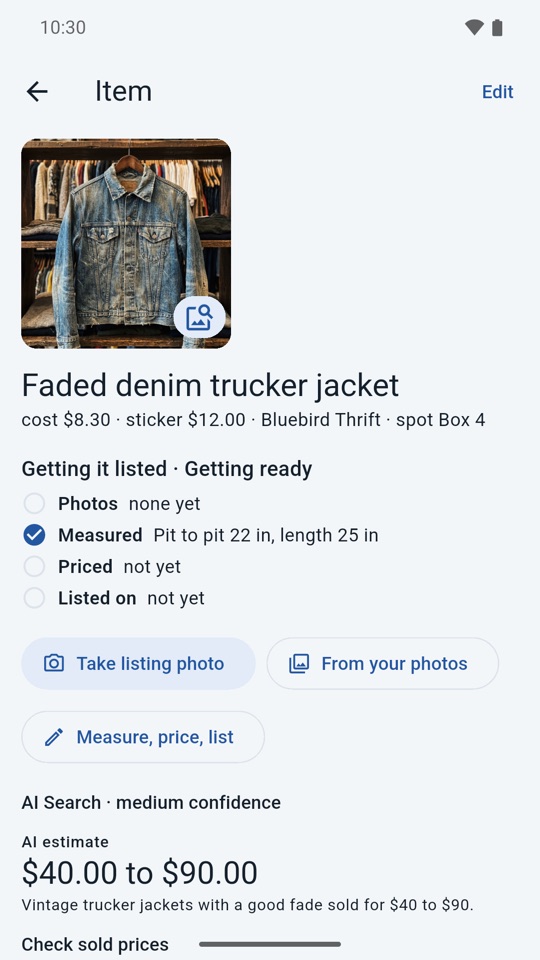
Each item in stock has a short checklist, so you can see what is ready:
- Photos. Take listing photos in the app or add them from your phone's photos. Save them to your phone's album when you are ready to upload elsewhere.
- Measured. For clothing, measurements are asked for before you list.
- Priced. Your listing price.
- Listed on. Which platforms it is on.
The item moves from "In a box" to "Getting ready" to "Listed". You list on each marketplace yourself. PickComp keeps track and does not post for you.
On the Seller plan you can also draft a title and description in a voice you pick, from the facts you tick on the item.
Sold, and what it made
Mark an item sold with the sale price, the platform fee and the shipping. You can note that the buyer paid shipping, or that the item sold as part of a bundle.
Profit is worked out from those parts each time you look. It is never a number typed in once and forgotten.
If the platform has a fee rule, Mark sold fills in the fee for you. That fee reads as estimated until you confirm it, and you can type over it. Sales you recorded before fee rules keep the fee you gave them and read as confirmed.
Fee rules
Open Settings, then Fees and buy price. Each platform has a rule: a percent of the sale price, plus a fixed amount, which can change above one price.
- A starting rate, with its source. Where a platform publishes its fees, PickComp starts you with that rate and shows where it came from and the day it was checked. Where it has none, the rule is blank and the fee stays yours to type.
- Check it. Platforms change their fees. Compare the starting rate to the platform's own fee page. PickComp does not read fees from a marketplace.
- Edit any rule. If a newer starting rate is published after you edit one, you choose whether to use it.
- One more setting. Shipping and target profit, set here, feed the max buy price on a lookup.
Reports and the spreadsheet
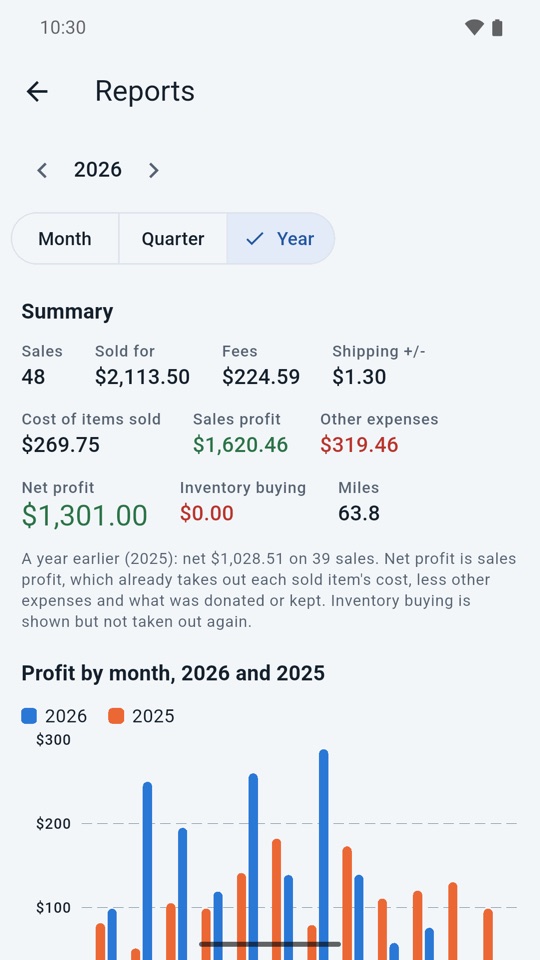
- Reports. Net profit, profit by platform and by month, cost of items sold, inventory buying, other expenses, stock on hand by age, and typical days to sell.
- Expenses and mileage sit in the same place as sales.
- Miles in dollars. Reports shows what your miles are worth at the IRS standard rate. The spreadsheet's Summary sheet has a Mileage Value column. The tax summary prices each drive at the IRS rate for the day you drove it, so it matches Reports. Your own rate is used only for miles the IRS table does not cover yet.
- Download a spreadsheet whenever you want one. Your records never depend on the app.
- Phone and laptop. Shop on your phone. List and do the books on a laptop at app.pickcomp.com, with the same account.
Mileage value is a figure for your records. PickComp is a tool for your resale business. It is not tax, accounting or legal advice.
Import from a spreadsheet
Already keep your items in a spreadsheet? Open Settings and choose Import items and sales.
- Any .xlsx or .csv file, including an export from PickComp.
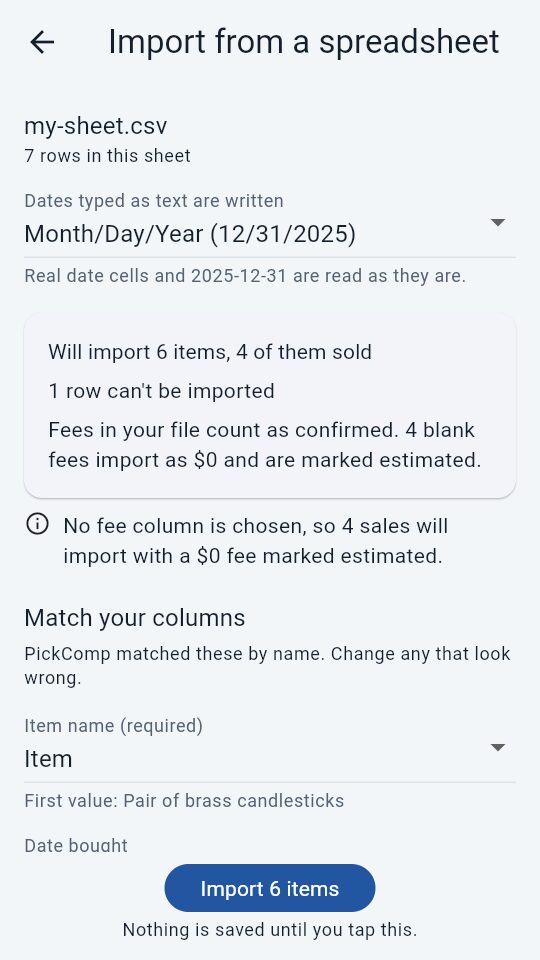
- You check the match. PickComp matches your columns to its fields by name. You change any guess that looks wrong.
- See the problems first. Every row that will not import is listed before anything is saved. Nothing is saved until you tap Import.
- Blank fees. A sale with no fee in your file imports with a $0 fee marked estimated.
- Run it again safely. Importing the same file again does not add items twice.
Up to 5 MB and 5,000 rows per sheet.
Fixing a haul after checkout
Things go wrong at a sale. These let you put them right.
Finishing the haul at home, without paying twice
- Add items you already paid for. At home, add the rest of the haul with no money field. The items share the total you already typed, so nothing is counted twice. Tap "Done adding items" when you are finished.
- Fix total. If you typed the wrong total, replace it with the right one. PickComp shows the result before you save, and shares the new total over the items still in stock.
- Paid total history. Every change to a trip's total is written to a short history on the trip.
- I bought more at this sale. If you really did pay more money, you type only the new amount, after a plain question to confirm.
- Sold and donated items keep their cost. Fixing a total never changes profit you have already counted.
Put an item back after checkout
On a checked-out trip, you can put an item back. It comes off the trip, and the trip's total is shared across the other items. PickComp asks first.
More than one open trip
Home lists every open trip, with a Resume button on each, so a second sale or a quick look does not have to wait. Each trip keeps its own item in hand. When two or more trips are open, Bought on a quick look asks which one it goes on.
One item edit view
See Photo lookup. On a trip item, cost is locked on the edit page and set by the trip's total, so it cannot drift from what you paid.